Highlighting any of the available projects in the left panel and clicking on the appropriate button will allow you to add reactions:
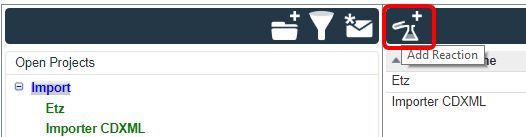
For reasons of integrity, it is not possible to delete reactions. However, double clicking on the reaction name will allow you to ‘Edit the reaction’ and change the status (from open to closed).
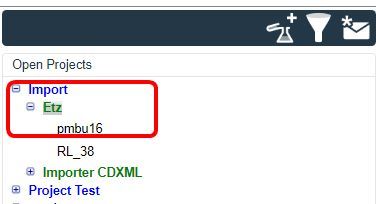
Once you have created the reaction, you will be able to add experiments just by highlighting the reaction and clicking on the appropriate button:

In the example below, we have created an experiment called ‘pmbu16’ in the ‘Etz’ reaction of the ‘Import’ project:
For further information about creating reactions and experiments in Mbook, please follow this link.
The next step is to add information about the experiment (reagents, products, amounts of reactants, solvents and products, reaction description, etc.):
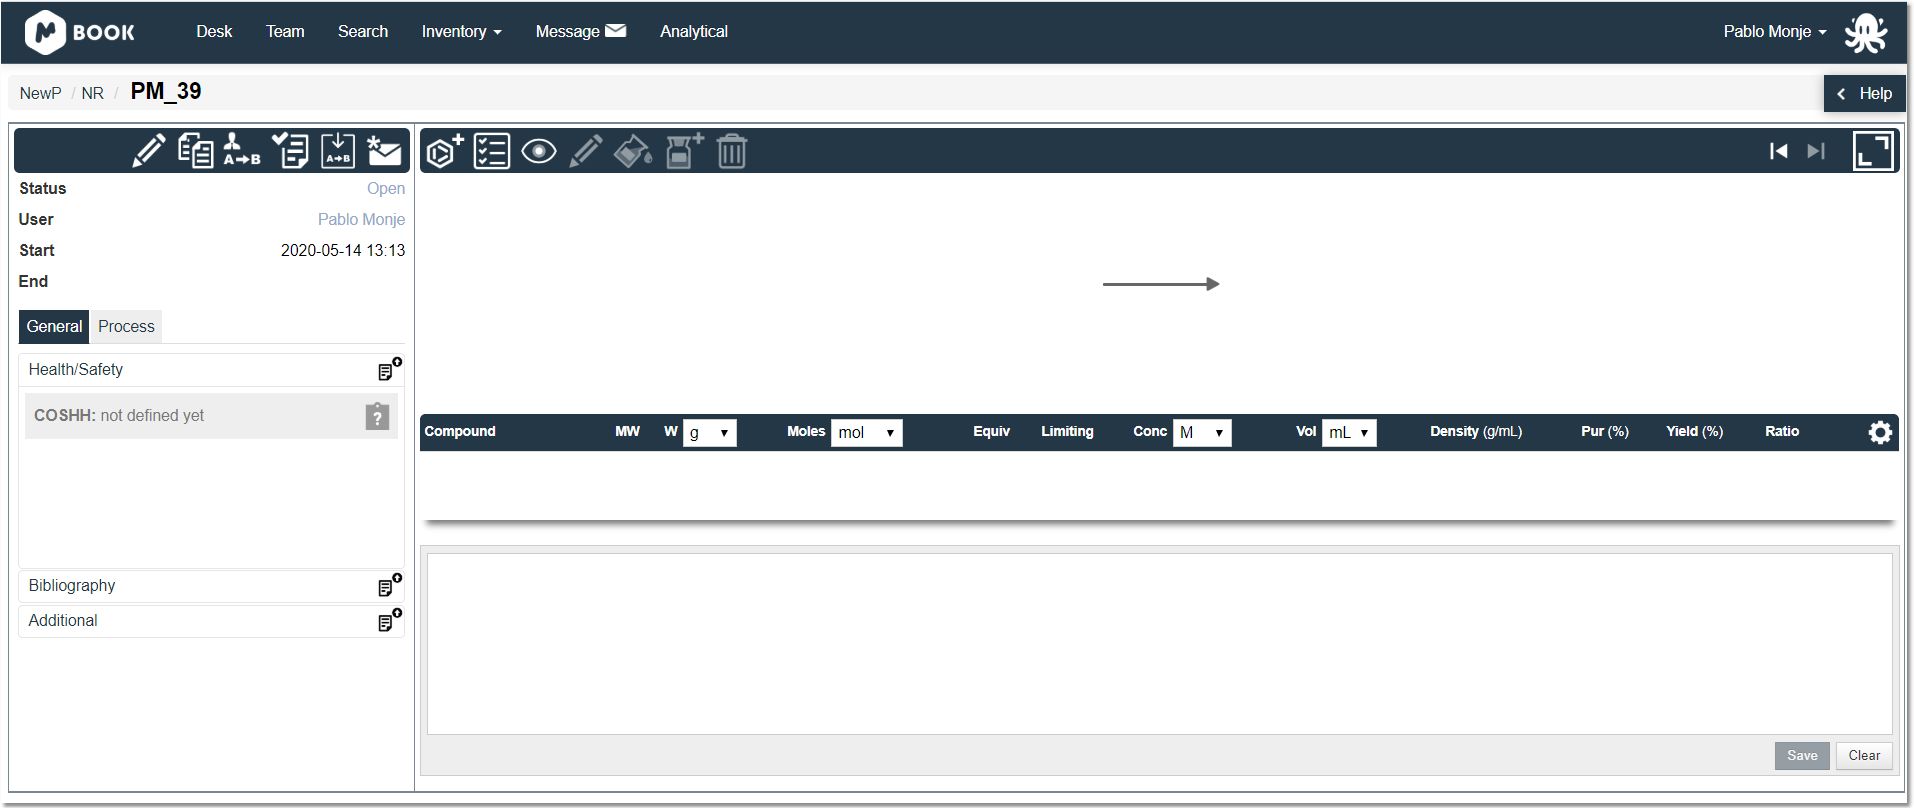
You will find a toolbar to Add ![]() , Edit
, Edit ![]() , Show/Hide
, Show/Hide ![]() , or Delete Participants
, or Delete Participants ![]() (reactants, solvents, and/or products) from the experiment, create
(reactants, solvents, and/or products) from the experiment, create ![]() , or assign
, or assign ![]() sources, and to select the experimental conditions
sources, and to select the experimental conditions ![]() (temperature, time, pressure, pH, etc.).
(temperature, time, pressure, pH, etc.).
Clicking on the ![]() button will allow you to add a participant to the experiment.
button will allow you to add a participant to the experiment.
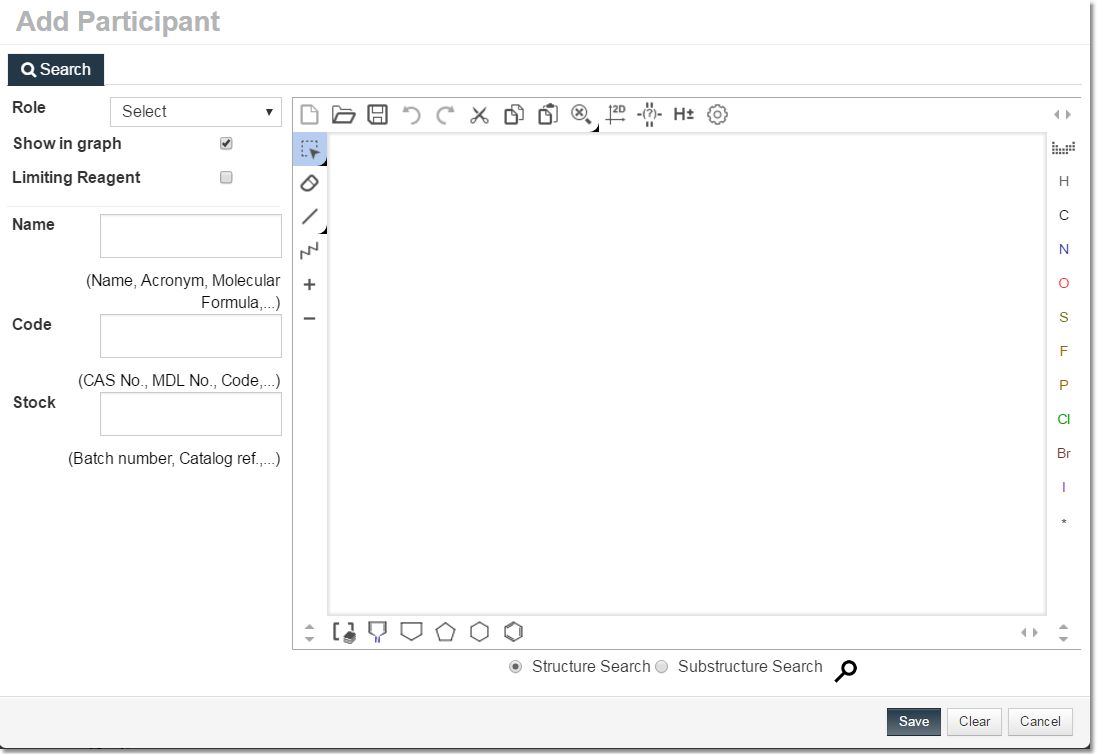
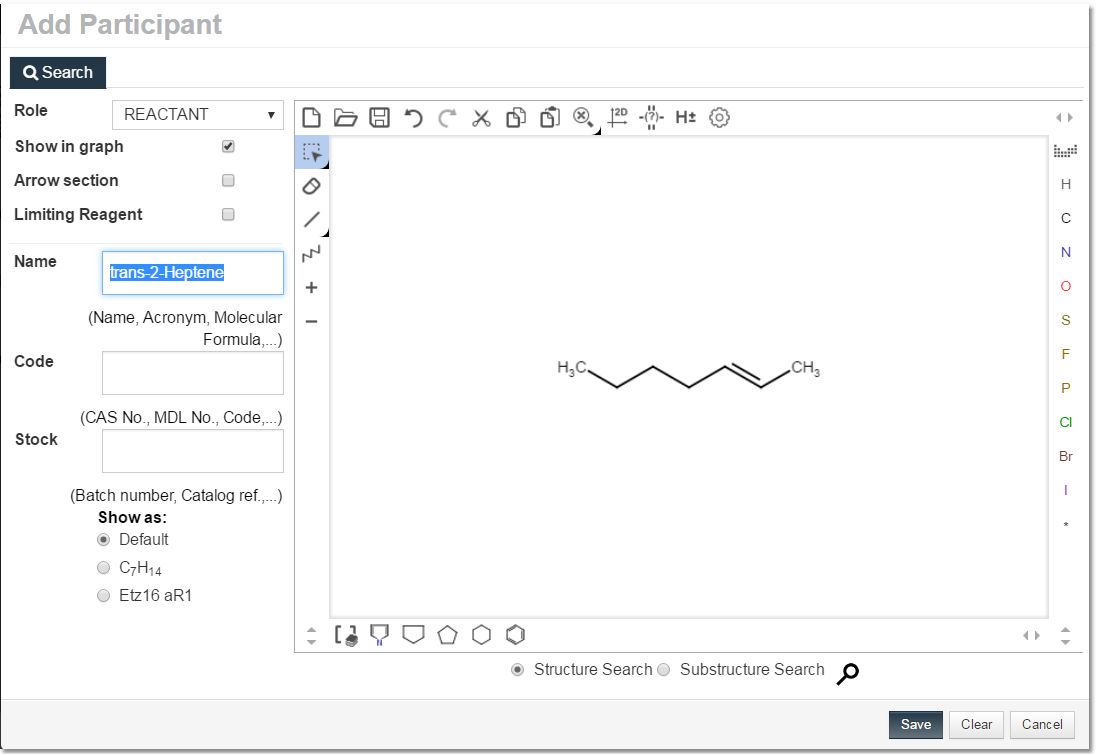
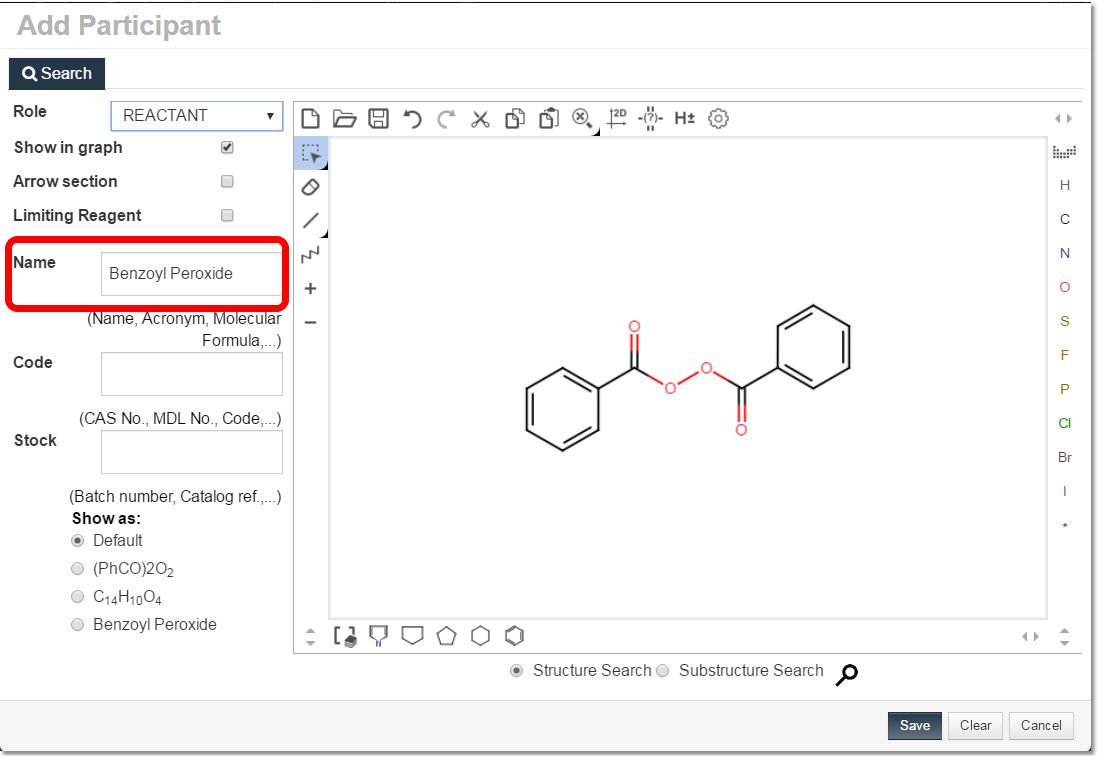
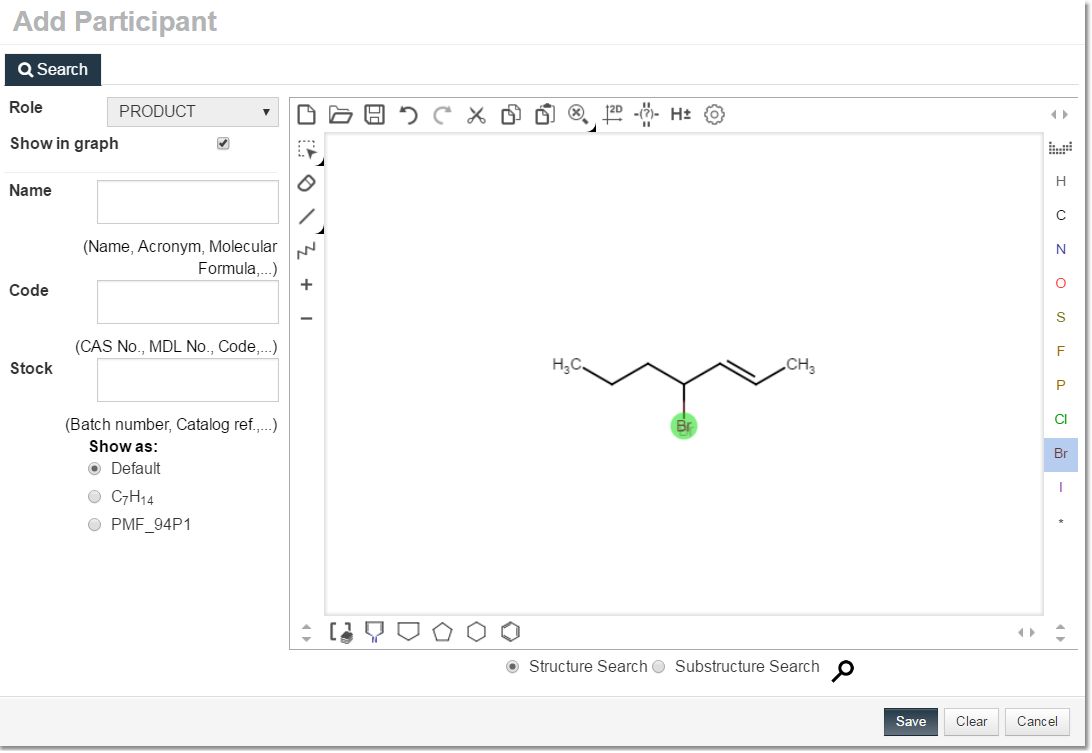
Clicking on the ‘Role’ scroll down menu will allow you to select the role of the new participant (reactant, solvent, or product). Check boxes will be available to include the new participant in the graphical reaction or in the arrow section and to select the 'Limiting Reagent'.
You can type the name of the desired compound (acronym, molecular formula, etc.) in order to search the database for that substance (this will be faster than drawing the molecule in the molecular sketcher, so we recommend you to attempt to find your reactants in the database in the first instance). Clicking on the Save button will add the participant to the experiment.
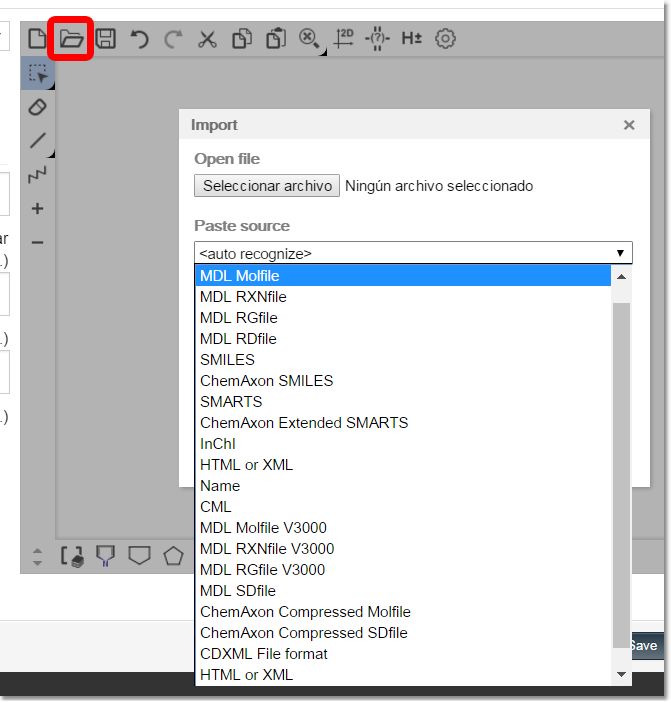
You can load molecules in the .mol, .cdx, smile, etc., formats by following the menu 'File/Import File (or even drag & drop .mol and .cdx files directly into the sketcher window):
You can also copy and paste structures directly from ChemDraw to Mbook using the "Copy As: MOL Text" (shortcut Alt+Shift+Ctrl+O) option.

Of course, you can draw molecular structures using the sketcher itself (useful if your compound is not present in the database) or just drag and drop .mol files into the sketcher window.
The ‘Move’ mode will allow you to move an atom or a bond just by clicking and dragging.
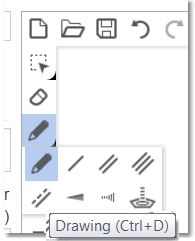
The Drawing mode (shortcut: Ctrl+D) will allow you to draw a carbon on your spectral window just by clicking and dragging on any empty field. Clicking on any existing atom will add an additional carbon. If you click on a single bond, you will get a double bond (clicking on a double bond will convert to a triple bond).
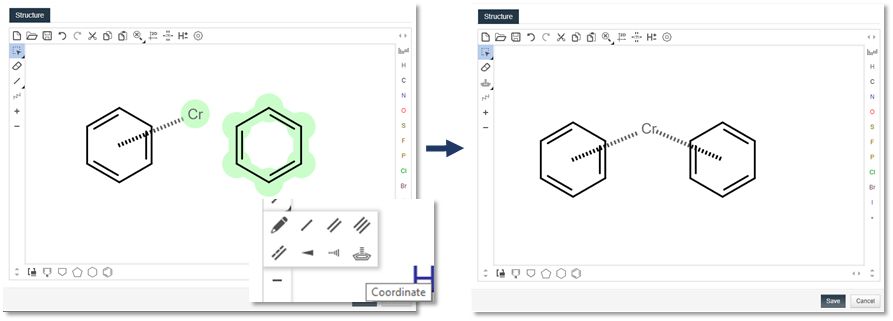
You can change the atom just by hovering the mouse over the atom and typing the applicable letter(s). You can also draw coordinate bonds for organometallic compounds. For further information in this regard, please follow this link.
Mbook incorporates Marvin JS Sketcher. For further information about this program, please follow this link.
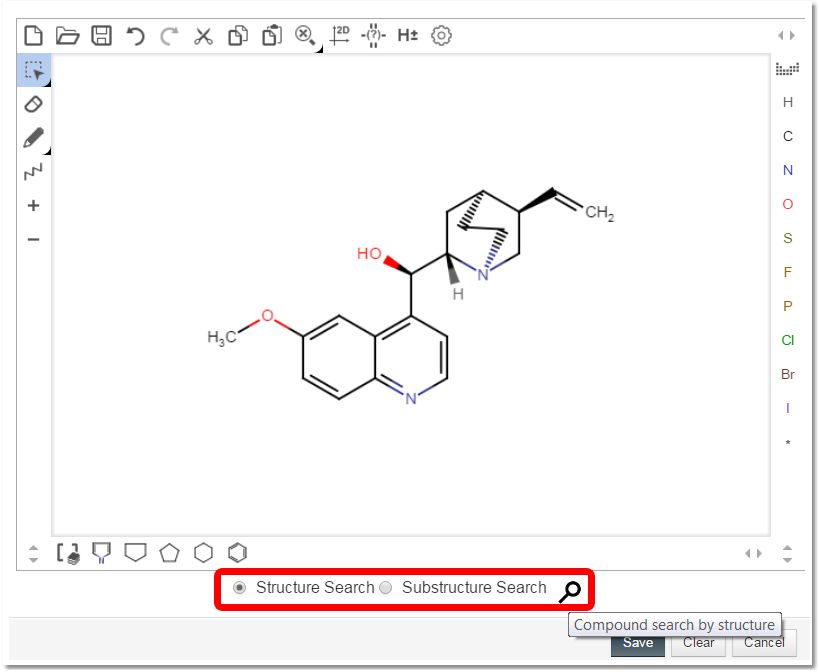
Once you have drawn the molecule, you can click on the ‘Save’ button to add the structure to the experiment graphic. You can also click on the ‘Search’ button to look for the molecular structure (or substructure) in the database.
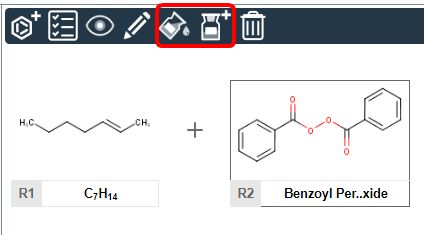
The next step is to add another reactant (benzoyl peroxide), just by typing its name in the edit box:
The solvent (CCl4) will be added in the same way.
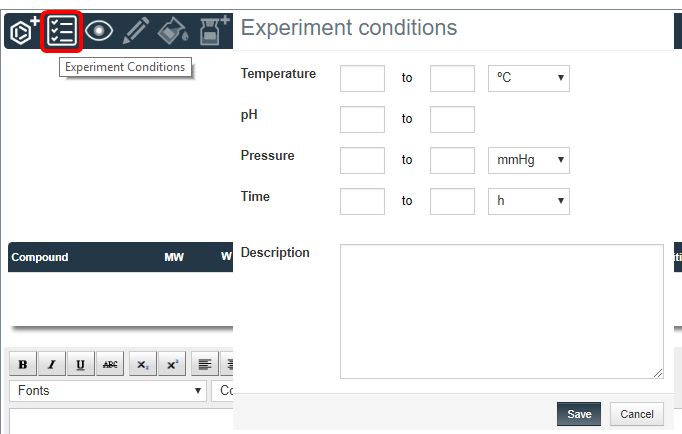
Clicking on the 'Experiment Conditions' button ![]() , will allow you to add the experimental conditions (after clicking the ‘Save’ button):
, will allow you to add the experimental conditions (after clicking the ‘Save’ button):
For further information about adding reaction participants and experimental conditions, please follow this link.
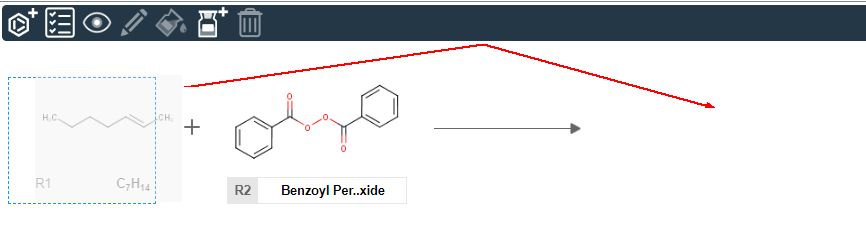
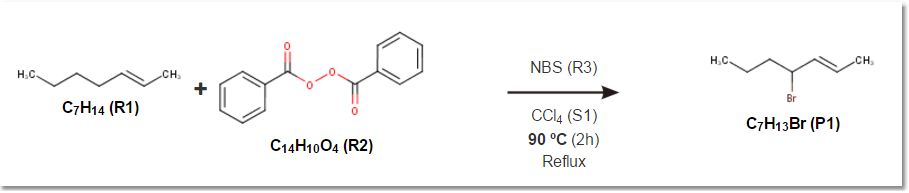
The next step is to add the product. If the structure of the compound is similar to any of the reagents, you can just click and drag the structure of the reactant to the ‘Product’ place:
The sketcher will then be launched with the structure of your reagent (but as "Role=Product"), so you will only need to add the necessary changes (a bromine in this case) and click on the save button:
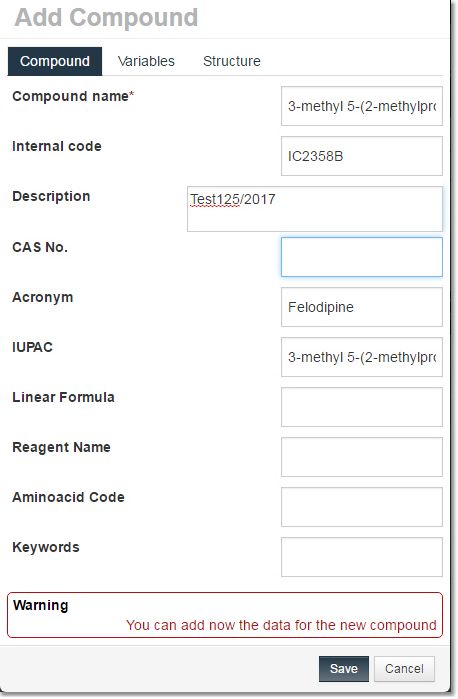
If the compound is not in the database, it will be added (including the IUPAC name) after having filled in the desired fields (internal code, description, acronym, etc.) and clicking on the 'Save button':
Clicking on the 'Properties' tab, will allow you to define different types of compounds (Resin, Enzyme, Solution and Supported reagent).

- Resin: If a compound checked as a Resin is added to an experiment, a column labelled ‘Loading (mmol/g)’ is added to the stoichiometric table.
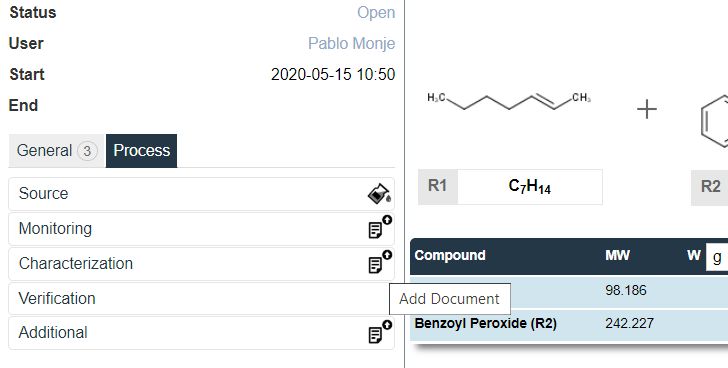
- Enzyme: If a compound checked as an Enzyme is added to an experiment, a column labelled ‘Activity (U/g)’ is added to the stoichiometric table. No automatic calculations are performed for this participant (the amount used in the experiment must be manually added by the user).
- Supported reagent: If a compound checked as a Supported reagent is added to an experiment, a column labelled ‘Loading (wt%)’ is added to the stoichiometric table. No automatic calculations are performed for this participant (the amount used in the experiment must be added manually by the user).
- Solution: If a compound checked as a Solution is added to an experiment, the concentration column is automatically populated from the defined value in the compound.
The resulting structure will be added to the Products:
You can move the reactants from the arrow to the reaction section (and vice versa), just by dragging and dropping.
Once you have drawn the experiment reaction with all the relevant participants, you can select the applicable amounts of reagents and solvents in the stoichiometry table.
After inputting all the necessary information and formatting all the experimental procedures, click on the Save button:
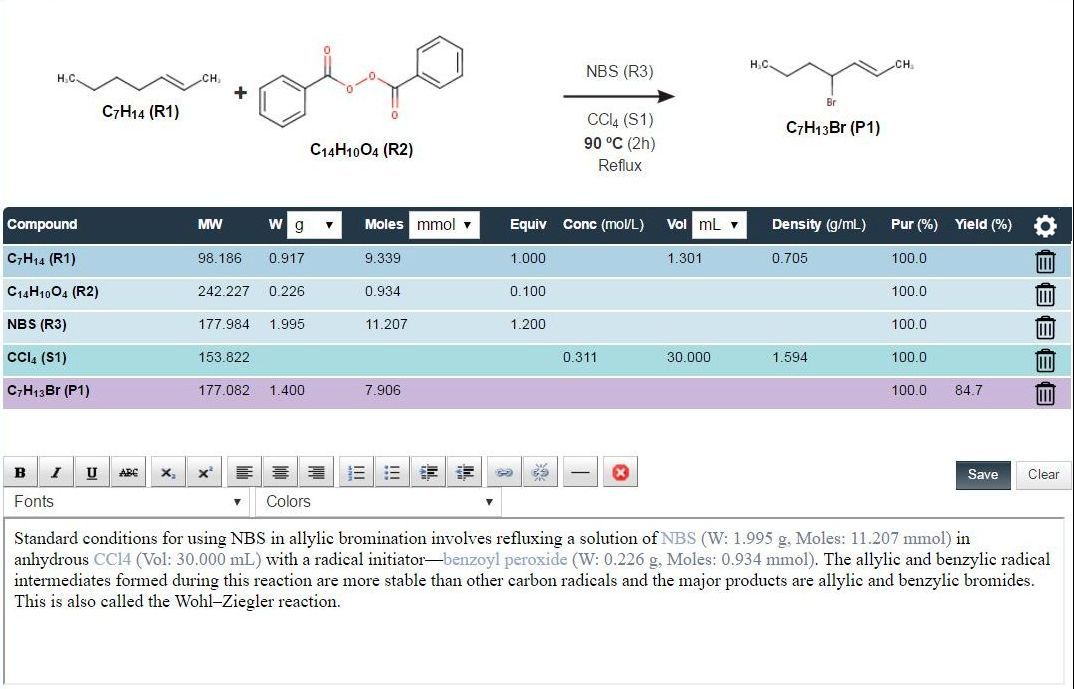
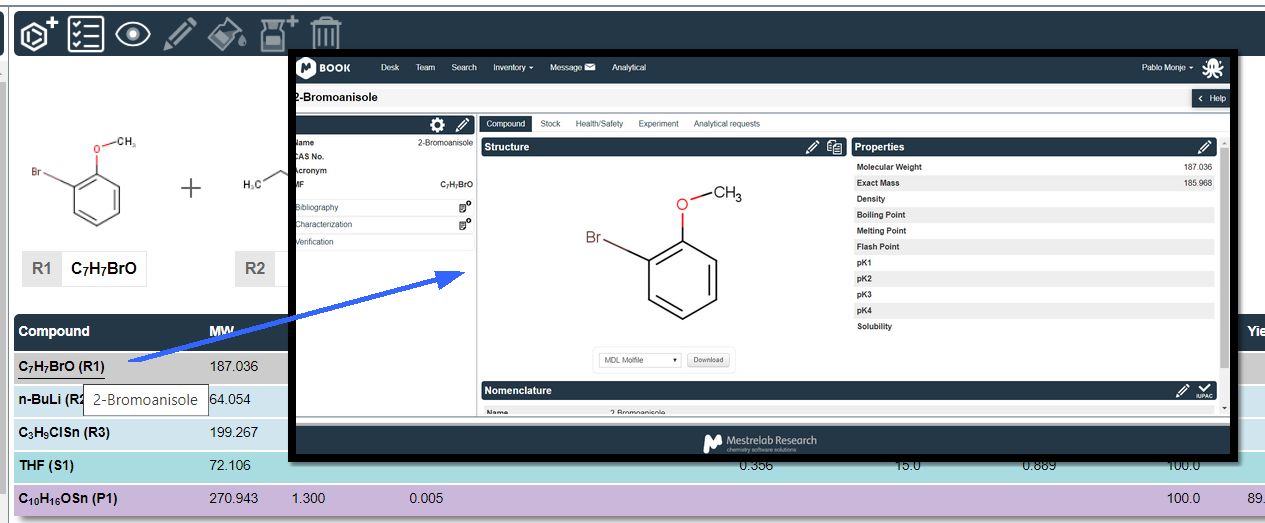
The compound names in the stoichiometric table include links to the inventory entries:
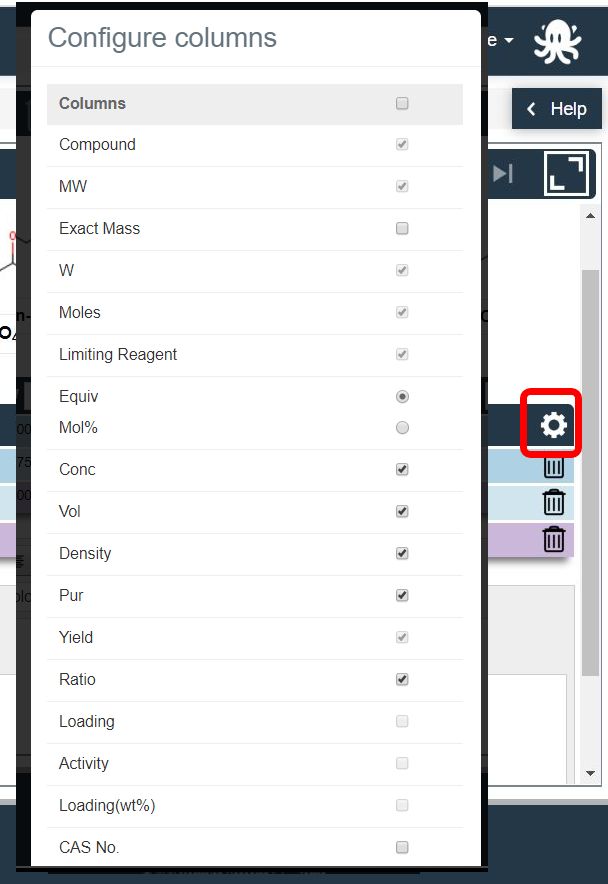
You can configure the desired columns that will be displayed in the stoichiometric table by clicking on the button highlighted in the figure below:
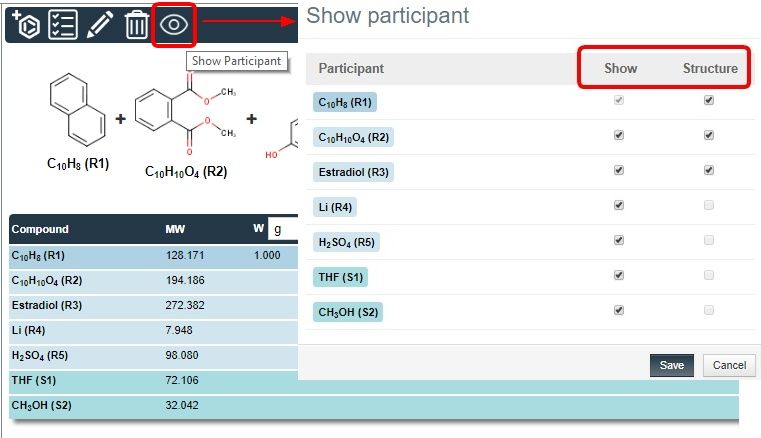
Clicking on the 'Show Participant' button ![]() , will allow you to show/hide the molecular structure in the graph experiment, and to display the participant as a structure, name, or both:
, will allow you to show/hide the molecular structure in the graph experiment, and to display the participant as a structure, name, or both:
To edit or delete participants, highlight them and click on the applicable buttons ![]()
![]() (from the toolbar or from the table).
(from the toolbar or from the table).
To create and assign sources, highlight the participant and click on the applicable buttons ![]()
![]() .
.
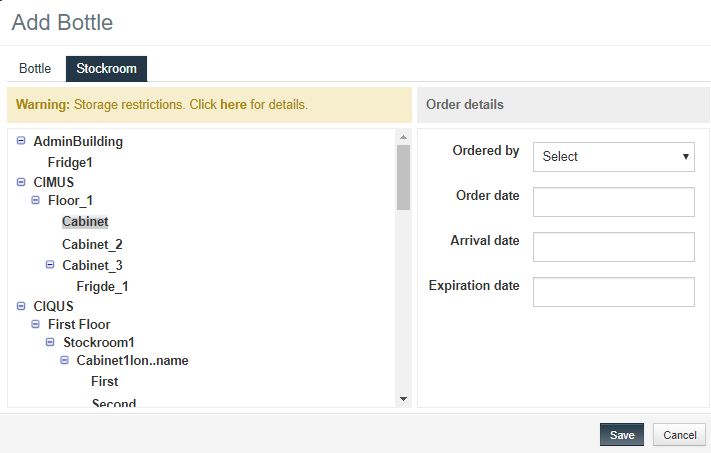
You can also add a location in the Stockroom for the bottle created:
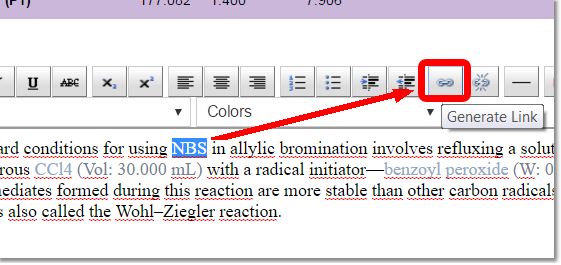
You can create links in the experimental section to the participants just by highlighting the applicable text in the description and clicking on this button ![]() .
.
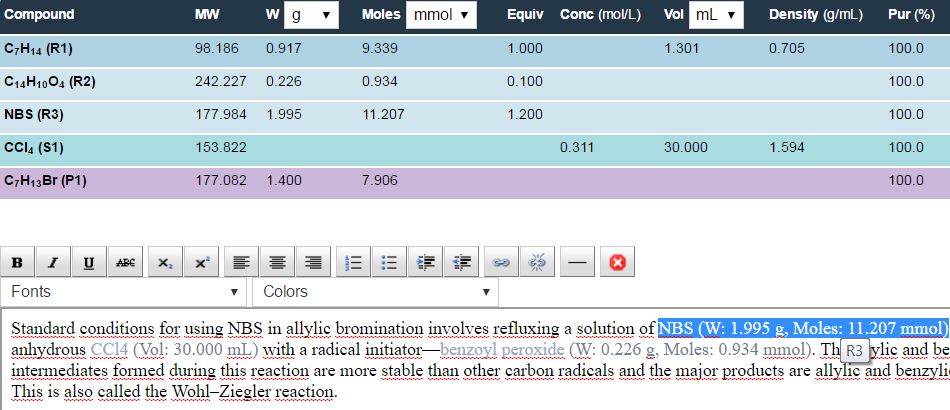
In the case of reactants, the amount and number of moles will be synchronized in both the table and the description. The same is true of the volume for solvents and for the amount, number of moles, and yield of the products:
To break a link, just highlight the word in the description and click on the appropriate button in the toolbar ![]() .
.
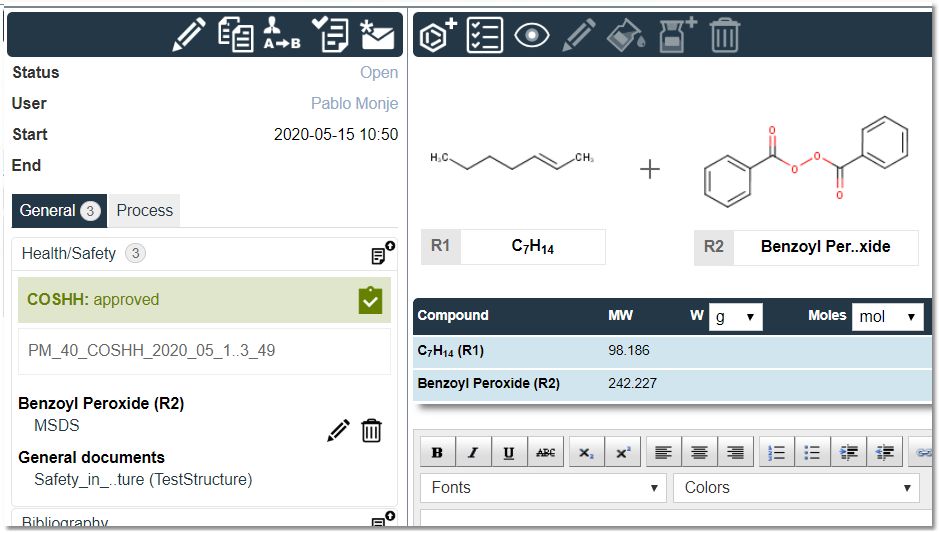
From the panel, you will be able to ‘add/edit or download in PDF format’ the ‘Material Safety Data Sheet’ of any of the participants:
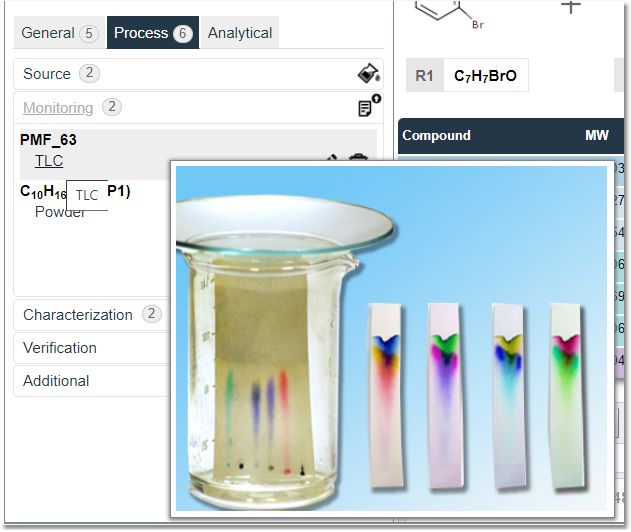
Selecting the 'Process' tab, will allow you to add other relevant documentation such as Mnova documents, the raw NMR/MS spectra in zip format, images, etc.:
Once you have added the attachments, they will be listed in the appropriate panel.
NMR, MS, or ElViS datasets can be uploaded as Mnova documents or as raw data in zip files.
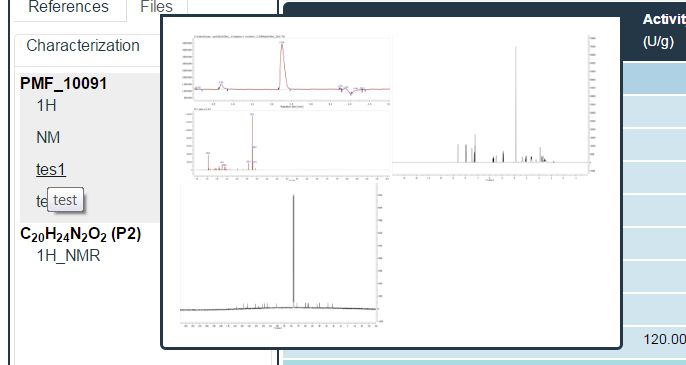
If you load a Mnova document, you will be able to see a small preview just by hovering the mouse over the name of the document. If the Mnova document contains more than one page (or the zip file contains more than one raw dataset), you will get the preview in tile mode.
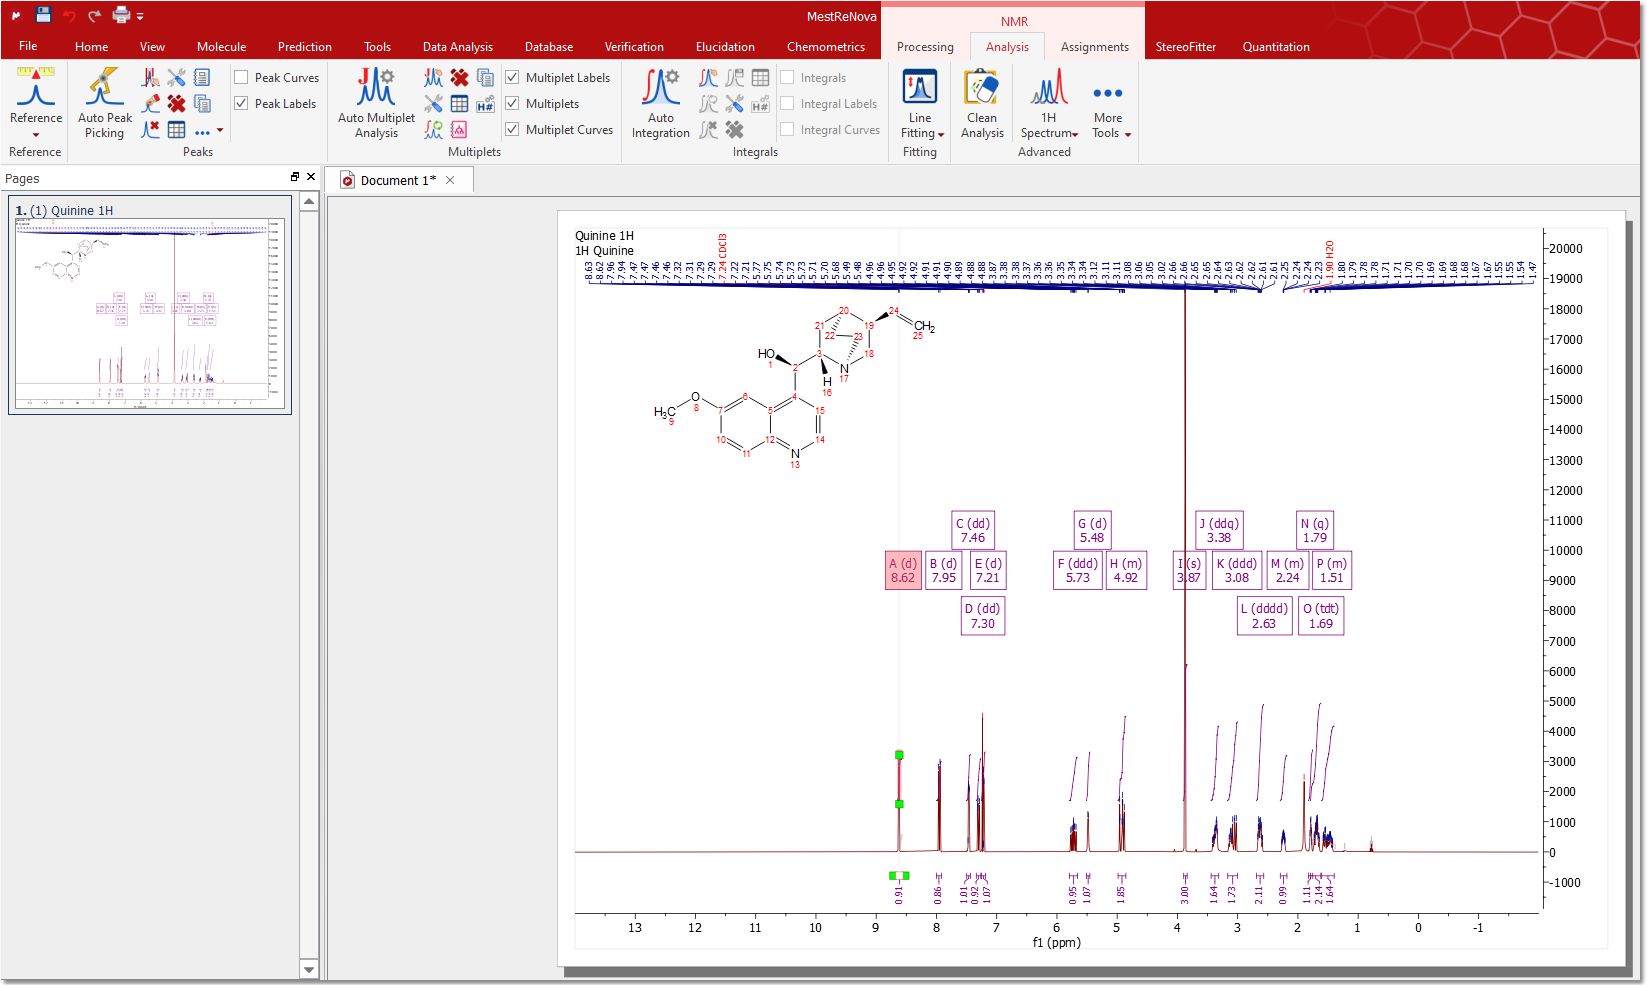
If you have loaded raw data in a zip file, the spectrum (or spectra) will be automatically processed. A large preview of the processed spectrum will be obtained by clicking on the Preview button.
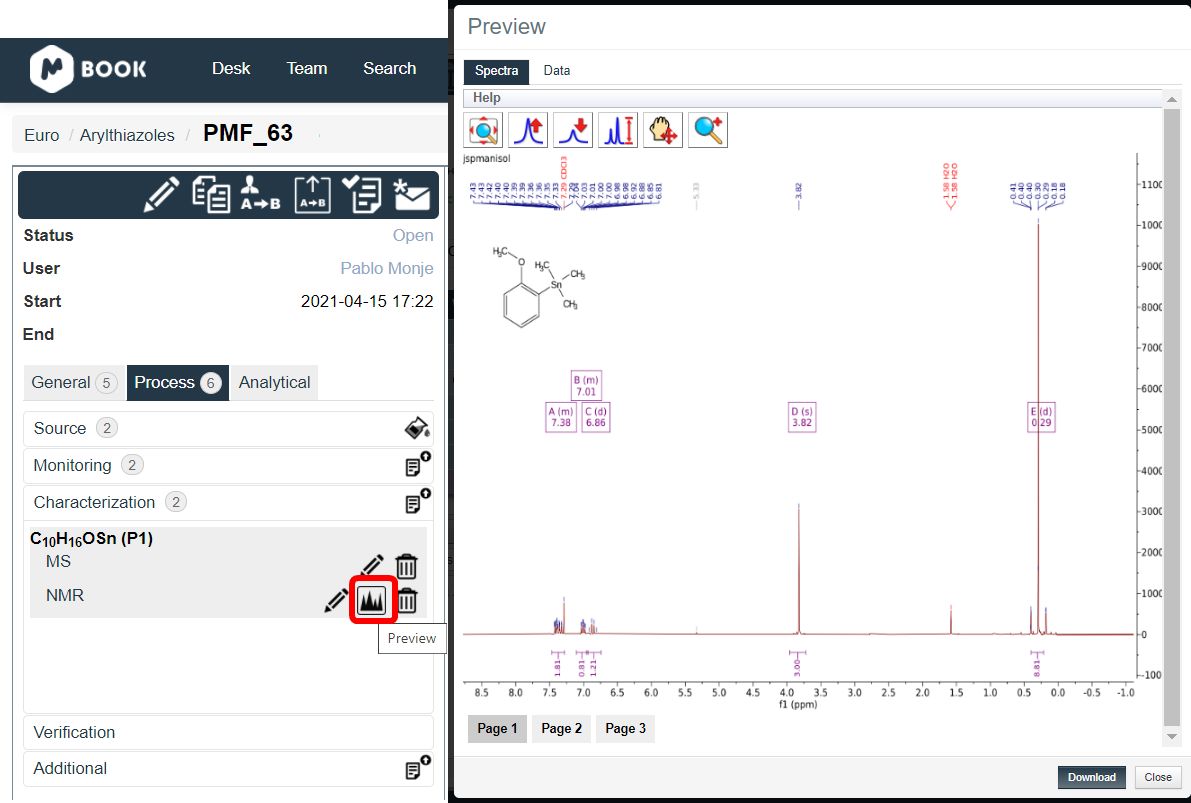
From the Preview, you can use the toolbar to 'pan', increase/decrease the peaks’ intensity, or zoom into a region of interest:
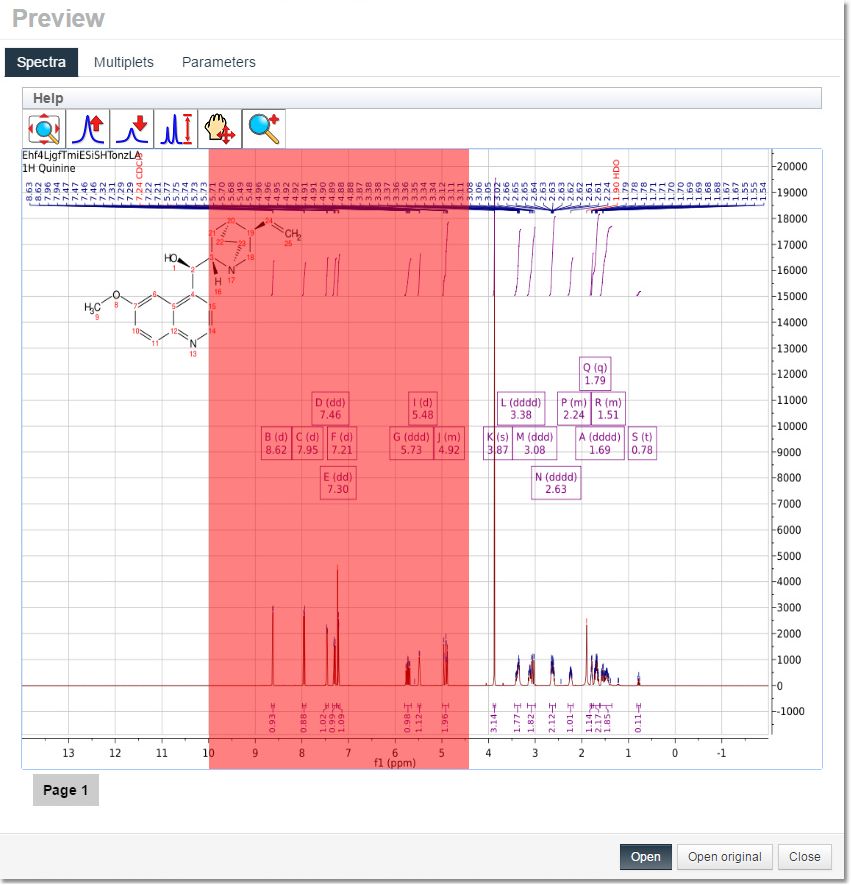
You can also display the ‘Multiplets Table’ or generate a ‘Mutiplet Report’ in the journal format selected in the combobox (JACS, in the example below):
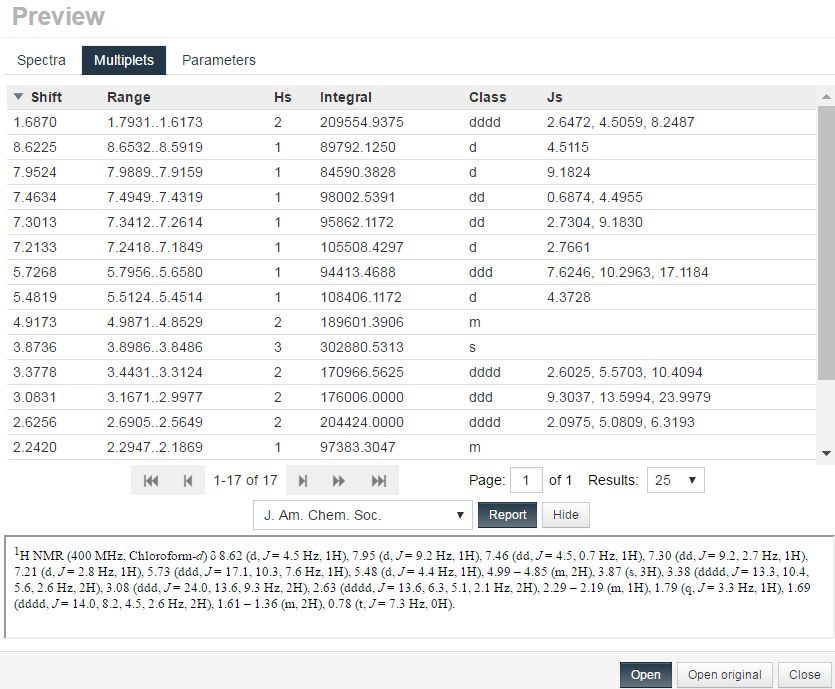
Clicking on the ‘Open’ button will load your Mnova document into Mnova (if you have valid licenses to do so), allowing you to reprocess the spectra or make any desired changes:
Both original raw files and Mnova documents are stored in the ELN. By default, when clicking on the link, the Mnova document will be opened; however, the original raw file can also be downloaded by clicking Edit and selecting the raw file from the same window.
Of course, you can also attach MS or ElViS spectra to your experiments:

If you have a verification license, you can check whether your datasets match your structures. See this chapter for further information.
You can also add images (very useful, for example, when adding TLCs) to your experiments. Hovering the mouse over the 'image name' will generate a preview. These images can be included at the end of the report (with the description added).
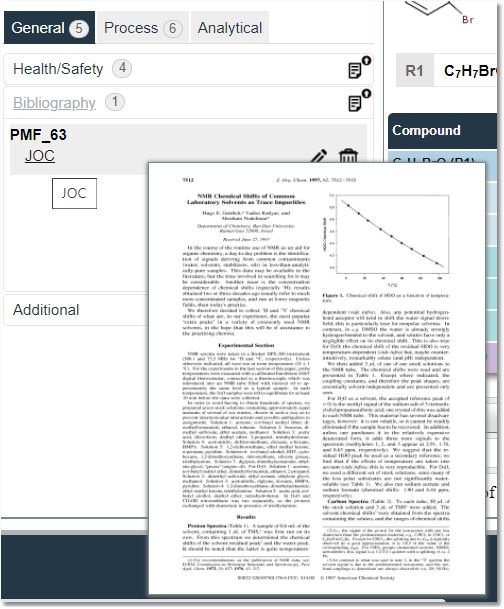
You can also add PDF files in the bibliography section. Hovering the mouse over the PDF link will display a preview of the first page of the document:
For further information about adding analytical documents to Mbook, please follow this link.
From the experiment panel, you can edit the description of the experiment, clone, assign the experiment to another user, generate a report as a PDF, import a reaction scheme from Chemdraw, and send a message with the report (to any member of the same group):
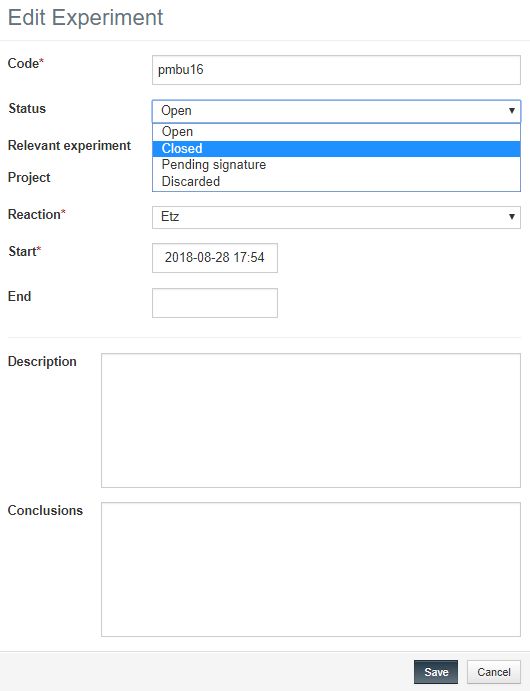
For reasons of integrity, it is not possible to delete experiments. However, clicking on the ‘Edit Experiment’ button will allow you change the status (from open to closed or discarded). From here, you can also rename the experiment code, modify the start and end dates, and type 'descriptions' and conclusions':
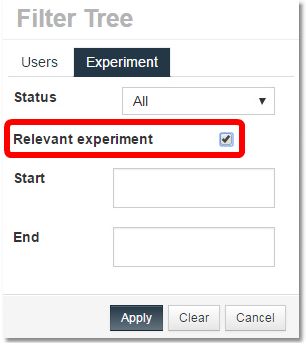
From the experiment tab, you can check the 'Relevant experiment' box. This type of experiment will be highlighted in blue in the desk, allowing the users to easily select the important experiments in a reaction (for cloning, reporting, etc.). You can also filter your searches using the relevant experiments:
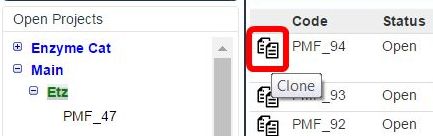
In the ‘Experiment panel’, you will also find a button that allows you to ‘Clone’ any experiment, a very useful feature for the creation of new experiments using existing ones as starting points (for instance, if you run the same experiment again under different conditions, or if you run a new experiment that is a modified version of an existing one).
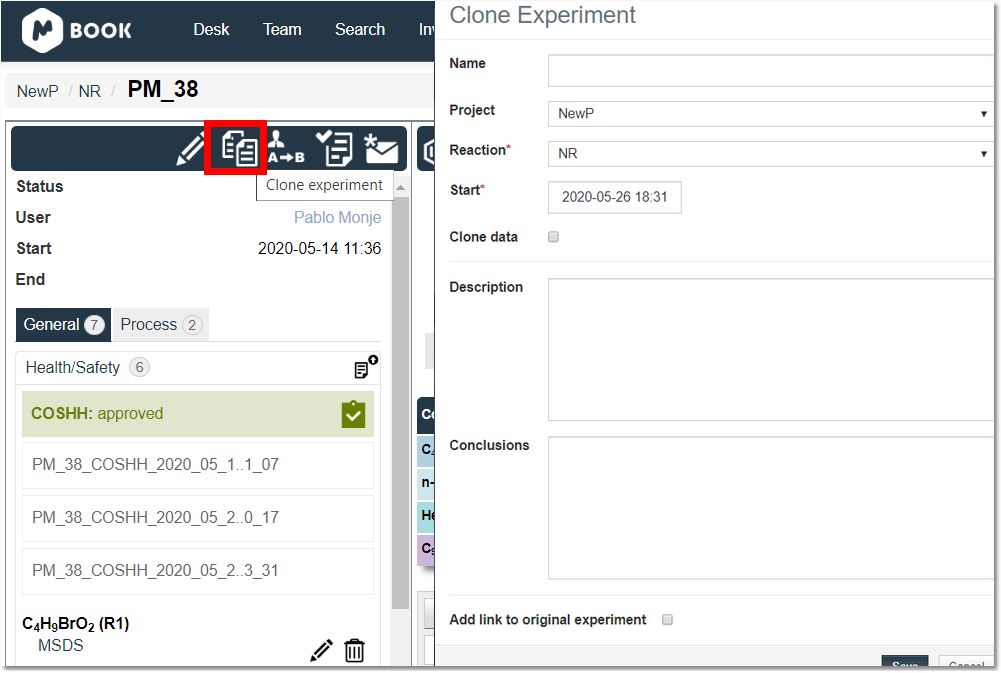
When the "Clone data" box is checked, the weight, volume, and number of moles will be automatically completed in the table for the cloned experiment. Please bear in mind that when you modify the amount of the limiting reagent, all the amounts of the remaining reactants will be automatically calculated according to the number of equivalents. The same button will appear in the list of existing experiments:
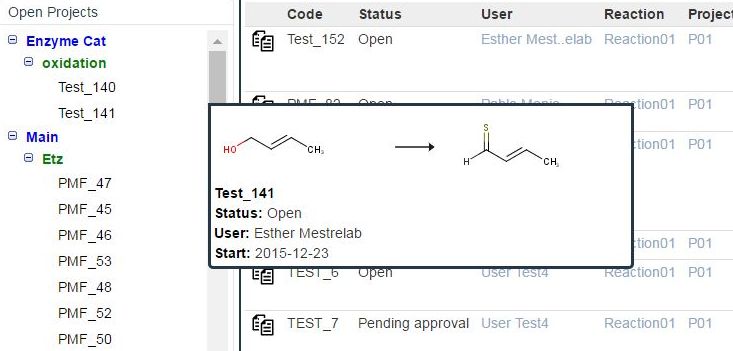
Once you have added your experiments, you will be able to navigate via the left panel using the expandable trees (hovering the mouse over any experiment will display a reaction preview):
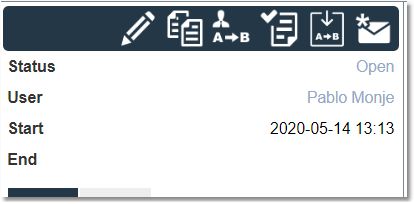
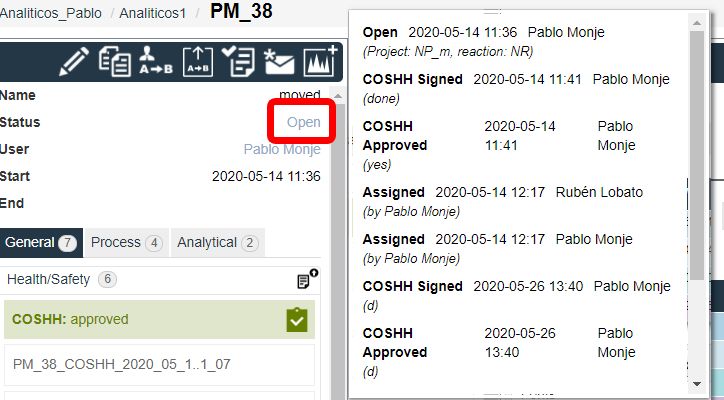
Clicking on any of the experiments on the left panel will show all the relevant information.
Clicking on the Status field will display the history:
You can also navigate through the experiments using the arrow buttons in the reaction scheme header:

You can assign experiments to other group members by clicking on the applicable button:

See also:
Resources about creating Reactions and Experiments
Resources about drawing Structures with Coordinate Bonds.
Watch a miniclip about creating an experiment in Mbook by following this link